Windows Registry Editor is similarly an application that enables you to modify the Window Registry. As the Windows Registry also contains the entire core and crucial settings of Windows, some parts of it are by default inaccessible to a normal user (even if you are an Administrator) so as a result you cannot modify them. So what happens if you have to delete a registry key in order for a fix to apply to a problem in your Windows that’s really spinning your head? Instead every time you try to delete it, you get the following error “Cannot delete key: Error while deleting key“. As said before, it is just a security measure taken by Windows to protect your Windows and can be easily bypassed using any of the following methods.
Method 1: Through Windows Registry Editor
For Windows 7 and Earlier Versions
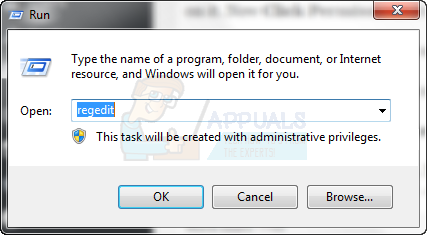
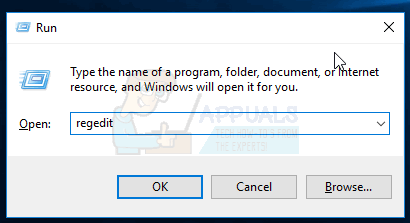
Here we will use the same program we use to make changes in the Windows Registry called the Windows Registry editor. Simply Press and Hold the Windows key and Press R. Run dialog box will open. Type regedit.exe in it and Press Enter. Click Yes if a UAC warning box appears.
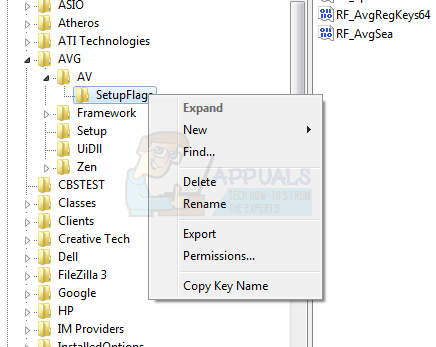
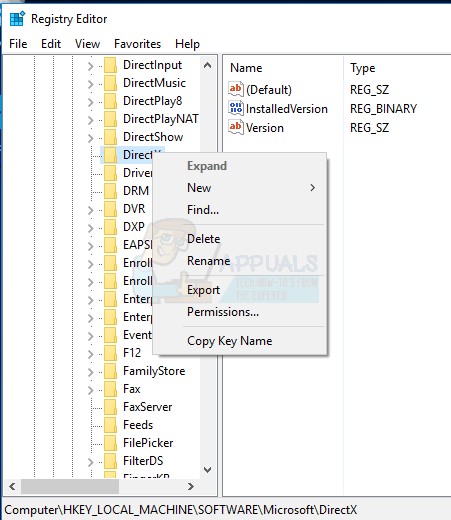
Windows Registry Editor will open. Now in the left pane, Navigate to the key you are unable to delete. Right Click on it. Now Click Permissions from the pop up menu.
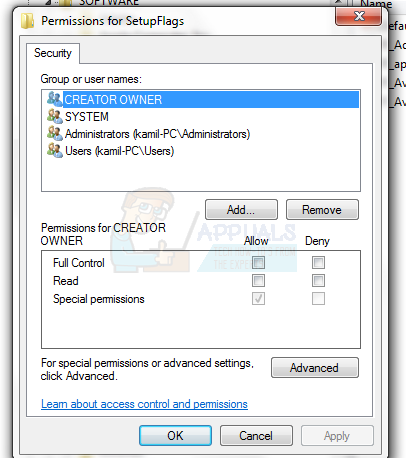
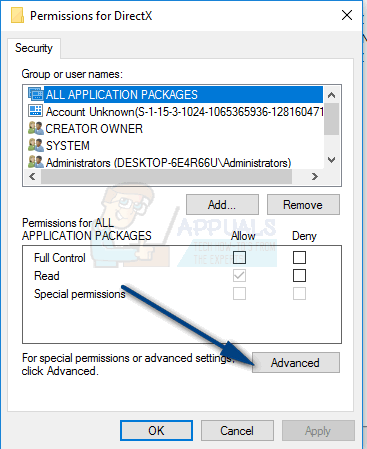
A dialog box will open. Click Advanced in it.
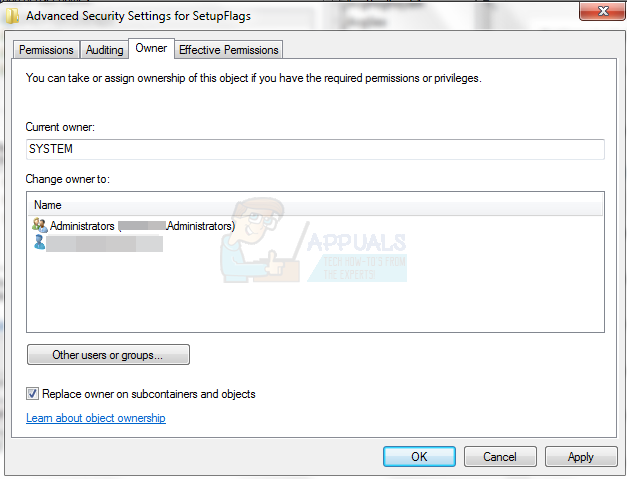
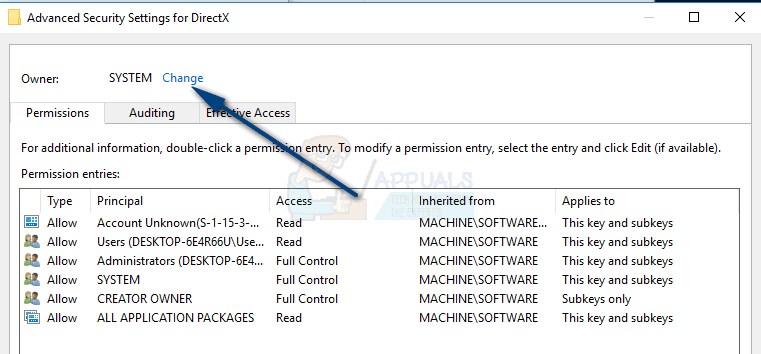
Click on the Owner tab. Select your user name in the list under Change owner to. Place a Check next to Replace owner on subcontainers and objects and Click Apply.
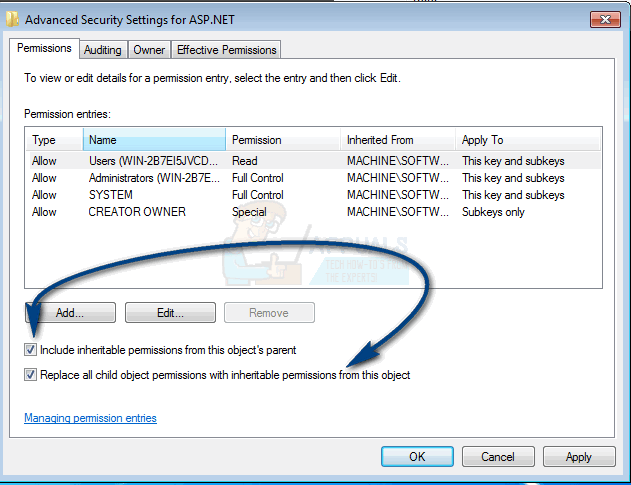
Now go to the Permissions tab. Now Place a Check next to Include inheritable permissions from this object’s parent & Replace all child object permissions with inheritable permissions from this object.
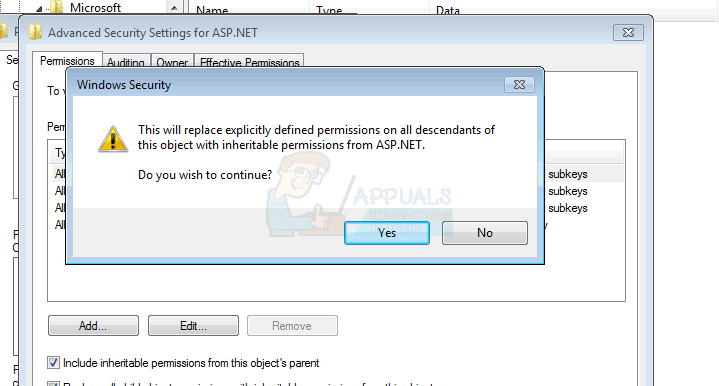
Now Click Apply. A warning message box will appear confirming your actions. Click Yes to continue.
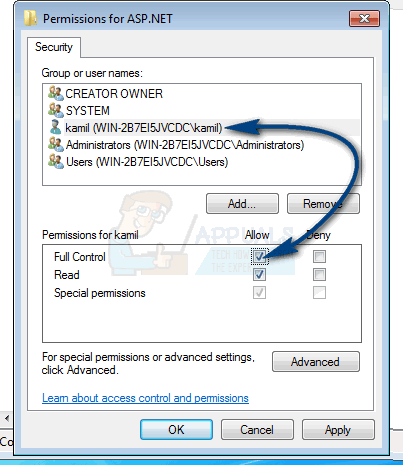
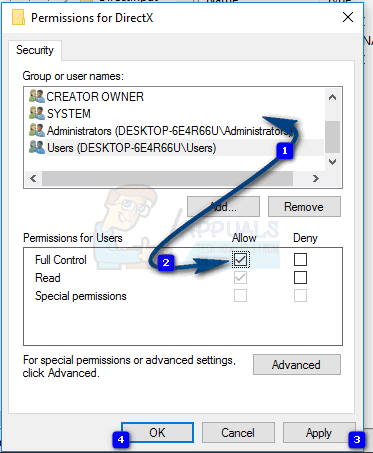
You will now be back to the Permissions dialog box. Select (Highlight) your user name in the list under Group or user names. Now Place a Check under Allow against the Full Control option in the box below. Now Click Apply and then OK. And now you will have full permissions on that Registry key.
For Windows 8 and Later
Simply open the Windows Registry editor by Pressing and Holding the Windows key and Pressing R simultaneously. Run dialog box will open. In it, type regedit.exe and Press Enter. Click Yes if a UAC warning box appears.
Windows Registry Editor will open. Now in the left pane, Navigate to the key you are unable to delete. Right Click on it. Now Click Permissions from the pop up menu.
A dialog box will open. Click Advanced in it.
On the top, next to Owner: Trusted Installer or SYSTEM, Click on Change.
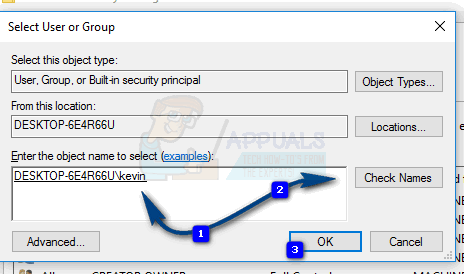
A Select User or Group dialog box will appear. In it, Type your exact user name and Click Check Names. Your user name will be converted into the required format. Now Click OK -> Apply -> OK
Select (Highlight) your user name in the list under Group or user names. Now Place a Check under Allow against the Full Control option in the box below. Now Click Apply and then OK.
And now you will have full permissions on that Registry key.
Method 2: Through CMD
In this method, we will take ownership of the registry key through Command Prompt and a small third part utility called SetACL Firstly to Download SetACL utilty , go to this page : here. Scroll a bit down, and Click on EXE version of SetACL to start Downloading it. Read and Accept the terms shown to start downloading. Open the downloaded zip file and also open the SetACL (executable version) folder in it. Now open the 32 bit folder if you have a 32 bit Windows installed or open the 64 bit folder if you have a 64 bit Windows installed. To know if your Windows is 32 bit or 64 bit, Press and Hold the Windows key and Press R. Type msinfo32 and Press Enter. A System Information Window will open. In the right pane next to System Type, if it is x64-based PC then it is a 64 bit Windows so open the 64 bit folder. If its x86-based PC then you have a 32 Bit Windows installed so open the 32 Bit folder. Once in the folder, Copy the SetACL.exe file. Now Press and Hold the Windows key and Press R to open Windows Explorer. Open the C drive. Now open the Windows folder. In it Search for a folder named System32 and Open it. Paste the SetACL.exe file in it. Click Yes if any UAC warning message appears. Now to use the SetACL command to take ownership of the key, you will first have to run Command Prompt. To do so, Press the Windows key to bring up Search (Start) menu. Type cmd. In the search results, Right Click on CMD and Click Run as administrator. Click Yes if a UAC warning message appears. A black Command Prompt window will open. Before we go any further, you have to know the complete path of the registry key you are going to take ownership of. You can easily copy it. To Copy it, Open the Windows Registry through the method above and navigate to the target key. Right Click on the target key and Click Copy Key Name. Now go back to the Command Prompt window, and Type the following command and Press Enter: Paste your key where it is shown in the command between quotes. DO NOT DELETE THE QUOTES. To paste, Right Click in the black window and Click Paste. For example, it would look something like this: Now again, go back to the Command Prompt window, and Type the following command and Press Enter: Again, do Paste the copied key where it is shown in the command and Press Enter. After running both commands, you will now have full access over the Registry key in question.
How to: Add Take Ownership To the Context Menu on Windows 10What is Takeown and How to Use it to take Ownership of Files and FoldersFix: Windows 10 Login Issues After Changing TrustedInstaller OwnershipHow to Transfer Ownership of Google Docs?